
The Best Method for Cleaning Bathrooms Like a Pro
A clean bathroom is less about scrubbing harder and more about working in the right order. Most people lose time by wiping the same surfaces twice, spraying products too soon, or cleaning the floor before dust and hair have been removed. A professional-style routine fixes that.
The best method is simple: clear, dust, pre-treat, clean from high to low, disinfect touchpoints, finish with floors and glass. That order prevents rework, gives cleaners time to break down grime, and leaves the room looking polished instead of just “good enough.”

Start with the right setup
Before cleaning anything, gather your tools. A bathroom has several surface types, and using one cloth or one spray for everything spreads residue around instead of removing it.
A solid bathroom cleaning kit includes:
Microfiber cloths
Use separate cloths for mirrors, counters, toilets, and floors.
A non-scratch scrub sponge
Choose one safe for tile, tubs, and sinks.
A toilet brush
Store it where it can dry between uses.
An old toothbrush or small detail brush
This helps around faucets, grout lines, hinges, and drain edges.
All-purpose cleaner
Use it for counters, exterior toilet surfaces, doors, and painted trim if the label allows.
Bathroom cleaner or soap scum remover
Use it for tubs, showers, and tile where body oils and soap residue build up.
Glass cleaner or vinegar-based glass spray
Use it on mirrors and shower doors, unless the manufacturer says not to.
Disinfectant
Use it on high-touch surfaces after visible dirt has been removed.
Vacuum, broom, or dry mop
Remove hair and dust before anything gets wet.
Mop or floor cloth
A small bathroom often cleans best by hand, especially behind the toilet.
Read product labels before use. Some cleaners need dwell time, which means they must sit wet on a surface for a set amount of time to work. Also, never mix bleach with ammonia, vinegar, or other cleaners. That can create dangerous fumes. Open a window or run the exhaust fan when using stronger products.
Clear the room before cleaning
Professionals do not clean around clutter. They remove it first.
Take out:
Bath mats
Trash
Towels and washcloths
Shampoo bottles from the tub ledge
Toothbrush cups and countertop items
Toilet paper rolls sitting on the floor or tank
Decorative items that collect dust
Put washable bath mats and towels in the laundry. Empty the trash and set the liner aside if the can needs cleaning. Move personal items into a basket so you can put them back quickly later.
This step may feel small, but it changes the whole job. With clear surfaces, you can wipe in long, steady passes instead of cleaning in awkward circles around bottles and jars.
Remove dust, hair, and loose debris first
Water turns loose dust and hair into sticky grime. That is why dry cleaning comes before wet cleaning.
Start high and work down:
Dust light fixtures, vent covers, door frames, window sills, and shelves.
Wipe the top of the medicine cabinet and mirror frame.
Dust the top and sides of the toilet tank.
Vacuum or sweep the floor, including corners and behind the toilet.
Pay attention to the bathroom fan cover. It often holds lint and dust that can fall onto clean surfaces later. If the cover is removable and washable, clean it according to the maker’s instructions.
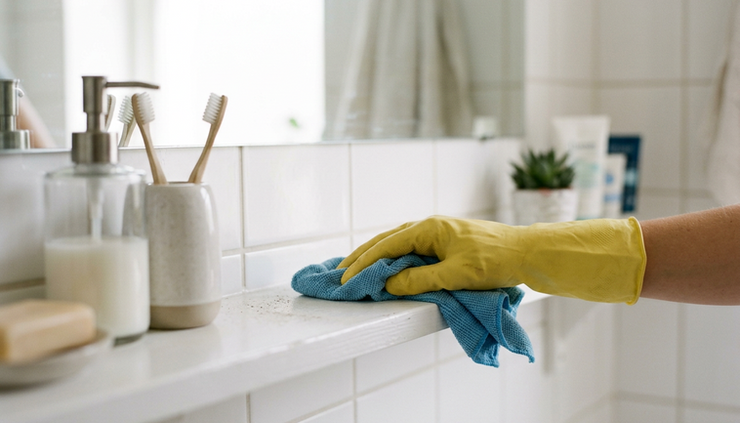
A dry microfiber cloth works well for most surfaces. For trim, corners, and baseboards, use a vacuum brush attachment. The goal is not perfection yet. The goal is to remove loose debris so your sprays and cloths can work on actual buildup.
Pre-treat the dirtiest areas
The biggest mistake in bathroom cleaning is spraying and scrubbing right away. Let chemistry do part of the work.
Pre-treat these areas before you clean the rest of the room:
Toilet bowl
Shower walls
Bathtub
Sink basin
Faucet bases
Grout lines with visible buildup
Shower door tracks
Around the drain
Apply the right cleaner, then let it sit for the time listed on the label. This waiting time breaks down soap scum, toothpaste, body oils, and mineral deposits.
For toilets, apply bowl cleaner under the rim so it runs down the sides. Close the lid while it works. For showers and tubs, spray from bottom to top to reduce streaking, then let the cleaner sit. If you have natural stone, avoid acidic cleaners unless the product label says it is safe for stone.
The professional advantage is patience. Let the product work before you use your energy.
While the cleaners sit, move to mirrors, counters, and exterior surfaces. This keeps the job moving without wasting time.
Clean from high to low
The high-to-low rule is the backbone of the best method for cleaning bathrooms like a pro. Gravity is not optional. Dust, spray mist, and dirty water move downward, so the floor should always come last.
Mirrors and glass come first
Spray glass cleaner onto a cloth rather than directly onto the mirror. This helps prevent liquid from seeping behind the frame and leaving dark edges over time.
Wipe in overlapping passes. Then buff with a dry microfiber cloth. For stubborn toothpaste spots, loosen them with a damp cloth first, then clean the glass. This prevents smearing.
For glass shower doors, use a cleaner meant for soap scum if regular glass cleaner leaves cloudy marks. Rinse well if the product requires it, then dry the glass to prevent water spots.
Counters and sinks need detail work
Clear counters are easy to wipe, but the area around the faucet usually needs extra attention. Toothpaste, soap, and hard water collect at the base.
Use a small brush around:
Faucet handles
Drain rings
Counter seams
Backsplash edges
Soap dispenser bases
Wipe the counter with an all-purpose cleaner, then rinse or follow the label if needed. Clean the sink basin last in this zone. Scrub around the drain, rinse, and dry the faucet for a polished finish.
Drying matters. A wet chrome faucet may be clean, but a dry one looks finished.
Shower and tub cleaning works best in sections
Return to the shower or bathtub after the cleaner has had time to sit. Scrub in sections so the product does not dry out before you rinse.
Work in this order:
Shower walls or tile surround
Fixtures and faucet trim
Soap dishes, niches, and corner shelves
Tub sides
Tub floor or shower pan
Drain area
Use a non-scratch scrub pad for soap scum. Use a detail brush for grout corners, caulk lines, and around fixtures. Rinse thoroughly, because leftover cleaner can leave a dull film or make the tub slippery.
If grout looks dingy after cleaning, it may need a dedicated grout cleaner. If caulk has black staining that does not come off, cleaning may not solve it. Old caulk can absorb stains and may need replacement.

Clean the toilet the right way
The toilet deserves its own system. It has both visible grime and high-touch surfaces, so order matters.
Start inside the bowl. Scrub under the rim first, then the bowl walls, then the waterline, and finally the drain opening. Flush with the brush still in the bowl to rinse it. Let the brush drip briefly into the bowl before returning it to the holder.
Next, clean the outside from cleanest to dirtiest:
Tank top and handle
Tank front and sides
Lid
Seat top
Under the seat
Rim
Outside of the bowl
Base and floor area around the toilet
Use separate cloths for toilet cleaning. Do not use the same cloth on the sink or counters afterward.
After visible soil is removed, disinfect the toilet handle, seat, lid, and any other high-touch areas. Make sure the disinfectant stays wet for the time listed on the label. Wiping it dry too soon can reduce its effectiveness.
Disinfect only after cleaning
Cleaning and disinfecting are not the same task.
Cleaning removes dirt, oils, soap residue, and many germs from a surface. Disinfecting uses a product to kill germs on a cleaned surface. If you disinfect over grime, the disinfectant may not reach the surface evenly.
Focus disinfectant on high-touch points:
Toilet handle
Faucet handles
Door knobs
Light switches
Cabinet pulls
Shower handles
Flush buttons
Toilet seat and lid
Trash can lid
Use disinfectant where it makes sense, not on every inch of the bathroom. Overuse can leave residue, damage some finishes, and create extra fumes. Follow the label, ventilate the room, and keep products away from children and pets.
Finish with the floor
The floor comes last because it catches everything from the rest of the cleaning process.
Vacuum or sweep again if dust and hair have fallen during cleaning. Then mop from the farthest corner toward the door so you do not step on wet areas.
For small bathrooms, a microfiber mop or cloth often works better than a large mop head. It can reach around the toilet base, behind the door, and along baseboards.
Use a cleaner safe for your floor type:
Floor type | Best approach |
Ceramic or porcelain tile | Use a mild floor cleaner and rinse if needed. |
Vinyl or luxury vinyl plank | Use a damp mop, not a soaking wet one. |
Natural stone | Use a stone-safe cleaner with a neutral pH. |
Sealed wood nearby | Keep water minimal and dry quickly. |
Pay special attention to the toilet base, corners, and the area near the tub. These spots collect hair, splashes, and product residue.
After mopping, let the floor dry fully before replacing bath mats. Putting mats on a damp floor can trap moisture and create odors.

Put everything back with intention
Once the bathroom is clean and dry, return only what belongs there. Wipe bottles before placing them back in the shower or on the counter. Soap bottles often have drips underneath, and shampoo bottles can leave rings on shelves.
Replace towels with fresh ones. Put down dry bath mats. Add a new trash bag. Check the mirror and faucet one last time for streaks or fingerprints.
This final reset makes the bathroom feel clean, not just wiped down.
A good rule is to keep counters as clear as possible. The fewer items left out, the easier the bathroom is to maintain during the week.
Keep it clean with a simple weekly rhythm
A professional-level clean does not have to happen every day. The goal is to prevent buildup so deep cleaning takes less effort.
Use this easy rhythm:
Daily
Run the fan during showers. Hang towels so they dry. Squeegee shower glass if you have it.
Every few days
Wipe the sink and faucet. Clean toothpaste spots from the mirror. Empty small trash if needed.
Weekly
Clean the toilet, sink, mirror, shower surfaces, and floor.
Monthly
Wash bath mats, clean the fan cover, scrub grout lines, wipe cabinets, and check caulk.
This schedule keeps the bathroom from reaching the point where every surface needs heavy scrubbing.
Common mistakes that make bathroom cleaning harder
Even with good products, a few habits can slow the job down.
Avoid these mistakes:
Using too much cleaner
More product does not always mean more cleaning power. It can leave sticky residue that attracts dirt.
Skipping dwell time
Spraying and wiping right away wastes the product.
Cleaning the floor too early
Dust and spray will fall onto it again.
Using one cloth for everything
This spreads germs and residue between surfaces.
Forgetting to rinse
Some bathroom cleaners need rinsing, especially in tubs and showers.
Ignoring ventilation
Moisture and fumes build up quickly in small bathrooms.
Mixing products
This can damage surfaces and create unsafe fumes.
The fix is not complicated. Work in order, use the right cloths, and give each product time to do its job.
The pro method in one pass
Here is the full sequence you can follow every time:
Gather supplies and ventilate the room.
Remove towels, mats, trash, bottles, and countertop items.
Dust high surfaces, vents, shelves, and trim.
Vacuum or sweep loose hair and debris.
Pre-treat the toilet bowl, shower, tub, sink, and grout.
Clean mirrors and glass.
Clean counters, faucets, and sinks.
Scrub and rinse the shower or tub.
Clean the toilet inside and out.
10. Disinfect high-touch surfaces.
11. Clean the trash can if needed.
12. Mop the floor last.
13. Dry shiny surfaces and replace clean items.
That order is what makes the method work. It saves motion, prevents cross-contamination, and gives cleaners enough time to break down grime.
A bathroom that is cleaned like a pro does not need to smell like strong chemicals or look stripped bare. It should feel fresh, dry, orderly, and easy to use. Start with the right sequence, keep your cloths separate, let products sit when they need to, and always finish with the floor. The result is a bathroom that stays cleaner longer and takes less effort the next time around.


